

Rated 4.7 out of 5 stars
4.7 / 5


726,000+ customers
Free 60-Day Returns
1-Year Warranty
726,000+ customers
Free 60-Day Returns
1-Year Warranty
Learn how to use red light therapy for face routines at home. Follow our step-by-step guide on prep, session timing, and topicals for radiant skin.
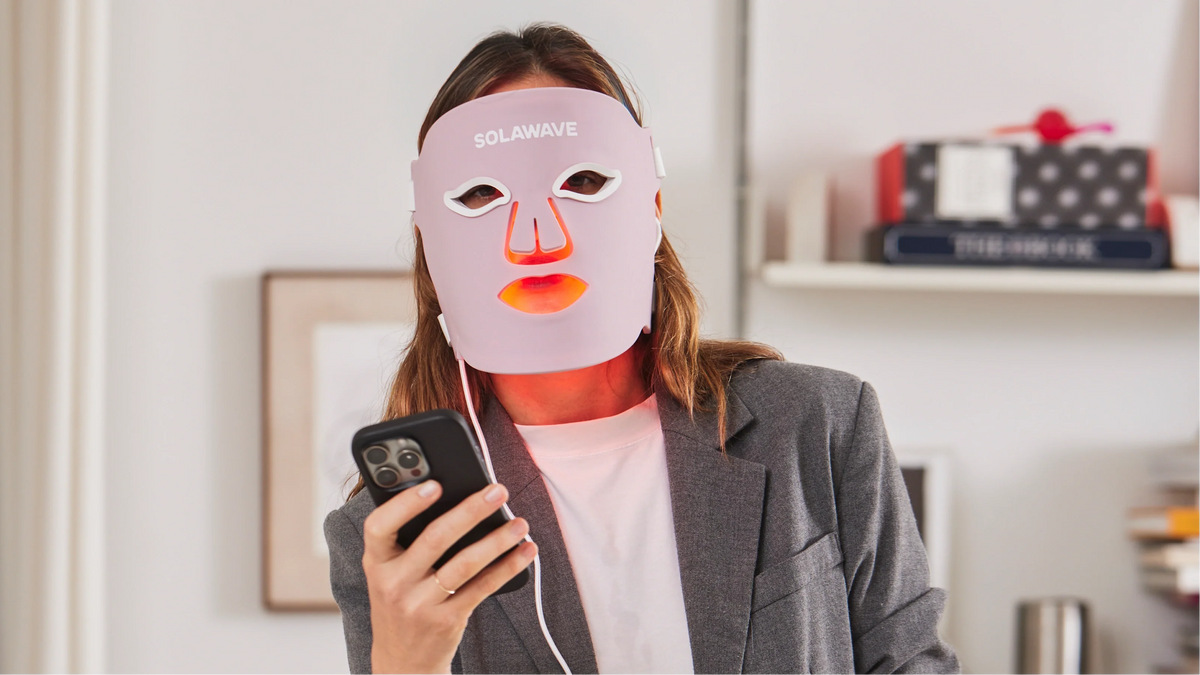
Adding light therapy to your beauty routine can feel intimidating if you have never used an LED device before. You might wonder whether to apply your serums before or after, how many minutes a session should last, or how often to treat your skin for visible improvements. Using red light therapy for facial care is straightforward once you know the core steps: start with clean skin, use the right wavelength for your visual goals, keep sessions consistent, and pair your device with supportive topical hydration. Solawave designs intuitive light therapy devices and clean topicals that make this process seamless at home. This guide explains how to use red light therapy for face routines safely, step by step, so you can achieve a refreshed, radiant look.
Red light therapy uses specific, visible and near-infrared wavelengths of light to support the appearance of radiant, youthful skin. Unlike ultraviolet light from the sun, cosmetic light therapy uses gentle, non-thermal light that does not tan or burn the skin. Instead, these light wavelengths interact with the surface layers of the skin to help your complexion look smoother, firmer, and more energized over time.
Different wavelengths deliver distinct aesthetic benefits. When selecting a device or planning your routine, knowing what each light color targets helps you personalize your sessions. For additional background, learn how red light therapy works.
| Wavelength | Color Band | Visible Skincare Focus |
|---|---|---|
| ~415 nm | Blue Light | Targets the look of surface blemishes and clarifies the complexion |
| ~605 nm | Amber Light | Encourages a vibrant, radiant glow and revitalized appearance |
| ~630 nm | Red Light | Helps target the appearance of redness and uneven tone |
| ~660 nm | Deep Red Light | Addresses the visible signs of aging and the look of fine lines |
| ~830 nm | Near-Infrared Light | Supports the appearance of firmer, plumper, and more supple skin |
Quick Answer: To use red light therapy on your face, cleanse your skin thoroughly, put on any required protective eyewear, run your device for its recommended 3 to 12 minutes, and follow with hydrating serums and creams. Repeat 3 to 5 times per week for the best visual results.
Proper preparation ensures light reaches your skin without interference from barriers like heavy makeup, thick mineral sunscreens, or oil-based balms.
Always begin with a fresh, clean face. Makeup, dirt, and daily grime can block or scatter light energy. Wash your face with a gentle, non-stripping cleanser, such as the Pre- & Probiotic Hydrating Gel Cleanser. Work a small amount into wet hands to create a light lather, massage gently over your face for 30 to 60 seconds, and rinse with lukewarm water. Pat your face dry with a clean towel.
What you apply before your light session depends on the specific device you use:
While cosmetic red light is gentle, the LEDs in full-coverage masks are bright. Always install and wear the included protective goggles when using a full-face LED mask or dedicated eye mask. Never substitute simply closing your eyes for proper eye protection when the device manual requires goggles.
Every device format requires a slightly different technique. Follow these instructions to get the most out of your at-home facial treatments.
Cleanse Skin -> Apply Compatible Prep Topical -> Position Device & Eyewear -> Run Timed Session -> Apply Hydrating Skincare
Full-face masks offer hands-free, uniform light coverage across the entire face. The Wrinkle Retreat Pro LED Face Mask combines Amber, Red, Deep Red, and Near-Infrared wavelengths across 320 LEDs to target the look of fine lines, uneven tone, and dullness simultaneously.
Targeted handheld wands allow you to focus on specific facial areas while combining multiple technologies. The 4-in-1 Skincare Wand pairs 630nm red light with galvanic current, gentle facial massage, and therapeutic warmth.
The delicate skin around the eyes often shows early signs of fatigue and fine lines. The Radiant Renewal Eye Recovery Pro delivers four wavelengths (Amber, Red, Deep Red, Near-Infrared) across 80 LEDs specifically contoured for the eye area.
When unexpected blemishes arise, targeted spot devices help visibly calm redness and clarify the skin. The Bye Acne: 3-Minute Pimple Spot Treatment utilizes blue light (415nm) to target the look of blemishes alongside red light (630nm) to soothe the appearance of redness.
| Device Type | Key Technologies | Session Duration | Recommended Frequency |
|---|---|---|---|
| Wrinkle Retreat Pro LED Face Mask | 4 Wavelengths (605, 630, 660, 830nm) | 3 minutes | 3–5 times per week |
| 4-in-1 Skincare Wand | Red Light (630nm), Galvanic Current, Warmth, Massage | 3 min/zone (12 min total) | 3–5 times per week |
| Radiant Renewal Eye Recovery Pro | 4 Wavelengths (605, 630, 660, 830nm) | 3 minutes | 3–5 times per week |
| 2-in-1 Skincare Mini | Red Light (630nm), NIR (830nm), Warmth | 3 min/area (12 min total) | 3–5 times per week |
| Bye Acne Spot Treatment | Blue Light (415nm), Red Light (630nm) | 3 minutes per spot | Once daily per spot |
What you put on your face after a light therapy session helps seal in hydration and support skin barrier comfort.
Light Therapy Session -> Hydrating Mist -> Peptide or Hydrating Serum -> Nourishing Moisturizer -> Broad-Spectrum SPF (AM)
After your session, mist your face with Pre- & Probiotic Refreshing Jelly Mist. Hold the bottle 6 to 8 inches away and mist generously. This adds instant hydration and prepares the skin to absorb your next layers.
Apply a few drops of Pre- & Probiotic Plumping Peptide Serum to your palms and press gently into your face and neck. Serums rich in peptides, hyaluronic acid, or niacinamide complement your light sessions by supporting a plump, dewy, and refreshed look. If you used an activating serum during a wand treatment, you can layer your peptide serum right over it without rinsing.
Smooth Pre- & Probiotic Nourishing Moisturizer or LightBoost Face & Neck Rich Cream over your face and neck using upward strokes. Moisturizers containing ceramides, plant oils, and barrier-supporting lipids help lock in water, keeping your skin soft and supple throughout the day or night.
If you complete your light session in the morning, finish with a broad-spectrum mineral sunscreen with an SPF of 30 or higher. Protecting your face from daily UV exposure preserves your visual progress and keeps your skin tone looking even.
Pro Tip: For an extra hydration boost on self-care days, apply the Hydrating Sheet Mask to clean skin for 10 to 20 minutes before or after your routine. Massage any remaining serum into your skin rather than rinsing it off.
Consistency is the most important factor when using red light therapy. Light therapy works gradually; a single 3-minute session will not transform your skin overnight, but consistent weekly sessions yield noticeable visual improvements over several weeks. For more guidance, read how often to do red light therapy.
At-home red light therapy devices are non-invasive and gentle, but following established safety protocols protects your skin and eyes. See additional guidance for red light therapy and sensitive skin.
Before using a new light device or topical product on your face, complete a simple patch test:
Using red light therapy for facial care is one of the most effective, relaxing ways to support the look of smooth, radiant, and youthful skin at home. By cleansing properly, pairing your device with hydrating LightBoost topicals, wearing required eye protection, and keeping to a consistent 3 to 5 session weekly schedule, you give your skin the exact environment it needs to look its best.
Key Takeaway: Consistent, short light therapy sessions paired with barrier-supporting topical skincare help improve the appearance of fine lines, uneven tone, and dullness over time.
Ready to build your personalized light therapy routine? Explore the FDA-cleared Wrinkle Retreat Pro LED Face Mask or take the skin quiz to find the perfect device match for your beauty goals.
It depends on your device. For full-face LED masks, you can apply lightweight hydrating topicals like LightBoost Face & Neck Serum before treatment, as long as they are fully absorbed. When using the 4-in-1 Skincare Wand, always apply LightBoost Wand Activating Serum right before gliding to ensure smooth movement. For acne spot treatments, skin should remain completely clean and bare until the session is finished.
Most at-home red light therapy devices, including LED masks and wands, are designed for use 3 to 5 times per week. While some spot treatments can be used daily on active blemishes, overusing full-face light therapy will not accelerate results. Sticking to 3 to 5 sessions weekly gives your skin time to respond comfortably while supporting a refreshed look.
Visible changes appear gradually with consistent use. Many people notice that their skin looks more radiant and refreshed after 2 to 4 weeks of regular sessions. Meaningful improvements in the look of fine lines, skin texture, and overall firmness typically develop over 4 to 8 weeks of using your device 3 to 5 times per week.
Yes, you should always wear the protective goggles supplied with your device when using full-coverage face masks or dedicated eye masks. While cosmetic red light is gentle, the LED diodes are very bright and direct exposure can cause eye strain or discomfort. Never rely solely on closing your eyes when device instructions call for protective eyewear.
The statements on this website have not been evaluated by the FDA. The information provided on this site is not intended to diagnose, treat, cure, or prevent any disease and should not be construed as medical advice. Results may not be typical.


